Hey, stranger, thanks for coming back! That's encouraging.
My last post kept me thinking, what if I only have one pot and one knife? A bowl, a spoon and a fork or a pair of chopsticks to eat with? Ok, fine, you need a chopping board and, maybe borrow that can opener from Jimmy, then you're good to go.

Ready?
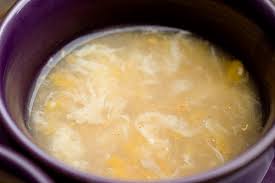
Here is my
Simple Egg Drop Soup for you.
You can add some vegetables (onion, spinach, carrots, celery, cabbage, cauliflower, even potato would go with it. Dump that Nissin noodles in and it's a nice, warm, filling light breakfast. I will show you how to add some meat later.)
I am cheating?

How about two ingredients?
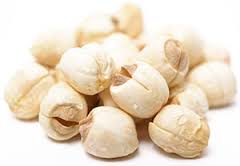
Here is my
Two Ingredients Soup. How about that?
I know what you're thinking. These are just soups! I got to be kidding!
Okay, my point is, even you have just very simple tools or ingredients, if you know how to make them work, make the ingredients sing, you are maximizing the pleasure from food when it's a masterpiece.
You see, the simpler the dish is, the more difficult it is to make it great and the more you can tell if it's done amateurishly or professionally.
Take egg drop soup for example, the key is not to pour in the egg before the water is boiling, not to touch it too soon, and you have to watch for that water to boil just right, not poaching, simmering or rolling vigorously.
If it's simmering (a few bubbles breaking at the water surface,) the temperature of the water is too low and the egg can't coagulate quick enough to keep it from breaking and melting into the water. The soup will end up being a pot of yellowish liquid, which may not be visually appealing but still edible (smiley, been there, done that). Same thing could happen if your stir up too soon before the egg has been cooked into ribbons. If the water is boiling vigorous in heaves and waves, the egg you pour in will be cooked and puffed up too quickly in bigger, thicker and fewer pieces. The texture of egg could be porous, not silken and smooth. A trick many chefs use is to thicken the soup up with a touch of slurry ( mix equal part of cornstarch and water, add into water to thicken,
my geeky page here) before adding the egg mixture and that will make the egg ribbons silken, and velvety.
There, even if you only have one pot, one egg, one can or one Nissin soup, one spoon and one bowl, you can still get flavor and texture. You owe it to yourself to make it count.
Next time when you don't know what to do to impress someone, you can make something as simple as egg drop soup, make it with just a few things, make it well and tell the story. I bet you'll totally rock and turn the tables.
Yes, I promise, I will post more for you, and not just soups, I know.
Stay well.
Note -
The major protein of egg white, ovalbumin, makes up 54% of the white and doesn't coagulate until the temperature reaches 80 °C. The yolk begins to thicken around 65 °C and sets around 70 °C. Since the different parts of egg coagulate at different temperatures, it is definitely not a simple matter to cook it right.
Simmer : one brings it to a boil and then reduces the heat to a point where the formation of bubbles has almost ceased, typically a water temperature of about 94 °C(200 °F) at sea level.
Poaching is a type of moist-heat cooking technique that involves cooking by submerging food in a liquid, such as water, milk, stock or wine. Poaching is differentiated from the other "moist heat" cooking methods, such as simmering and boiling, in that it uses a relatively low temperature (about 160–180 °F (71–82 °C)).